Every new phone in market has some or the other innovative feature and LG Stylo 4 also has some. Yes, it features Smart Rear Key, which allows screenshot by double taping the fingerprint sensor located at the back of phone. Also the Capture+ drop down option adds quick option to take a screenshot.
How to take Screenshot on LG Stylo 4?
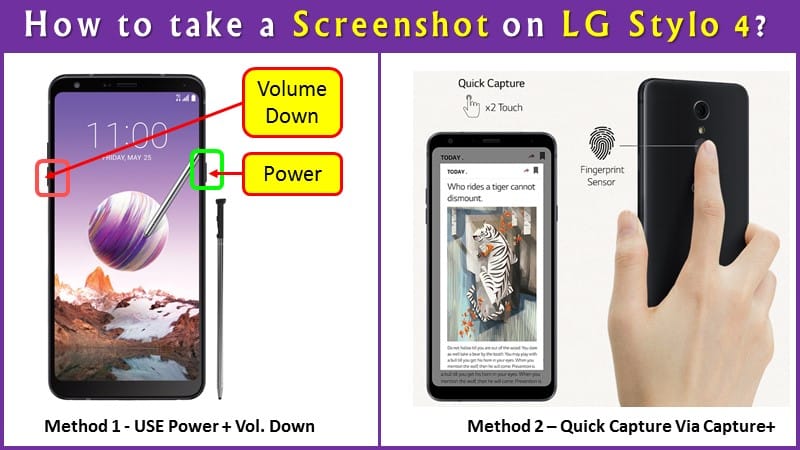
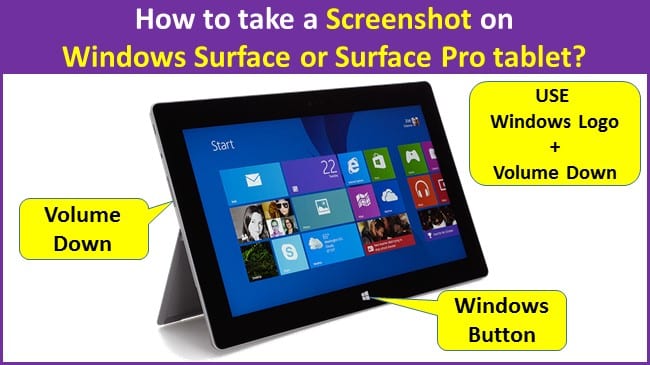
Simplest method is to use Power button and Volume down (-) keys simultaneously. But New innovative method of using Smart Rear Key, which allows quick capture by just twice touching the fingerprint sensor located at the back of phone.
Here in this post I have explained following 5 methods to take a screenshot on LG Stylo 4 phone.
Method 1) Using hardware buttons Power + Volume key
Method 2) Using Capture+
Method 3) Using scroll capture
Method 4) Using Smart Rear Key
Method 5) Using Google Assistant
Also at the end of post I have explained How to write notes on a screenshot? which is also unique feature of this LG Stylo 4 phone.
Method 1) Using hardware buttons Power + Volume key
This is standard method of taking a screenshot on Android phones.
Applicable to : LG G2, LG G4, LG G6, LG V20, LG Stylo 2, LG Stylo PLUS 2, LG LG Stylo 3, LG stylo 3 plus, LG Stylo 4
Step-by-Step Guide
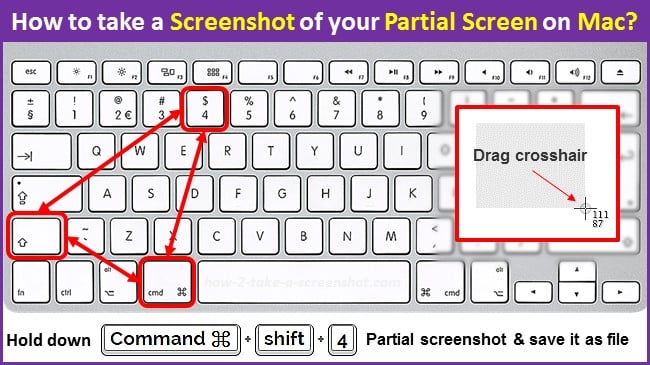
1) Prepare the screen with photo or image you want to screenshot.
2) Now Press and hold the Power/Lock key and the Volume Down (-) key simultaneously for a second.
3) When you leave buttons, with a blink & shutter sound, the Screenshot will be saved to the Screenshots folder in Gallery.
Method 2) Using Capture+
Applicable to : LG G2, LG G4, LG G6, LG V20, LG stylo 3 plus, LG Stylo 4
This feature needs to be enabled first before using it.
Goto Settings >> General >> Shortcut keys >> turn on Open Capture+
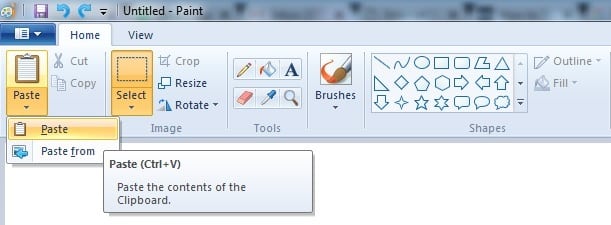
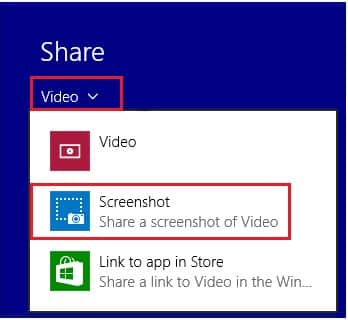
Now open the screen you want to take a screenshot, and drag the status bar downwards, then tap Capture+ icon ![]()
Status bar is the top bar where you normally see all status icons, the time and the battery level.
Note : When the screen is turned off or locked, you can quickly access Capture+ by pressing the Volume Up (+) key twice. To use this feature, tap Capture+
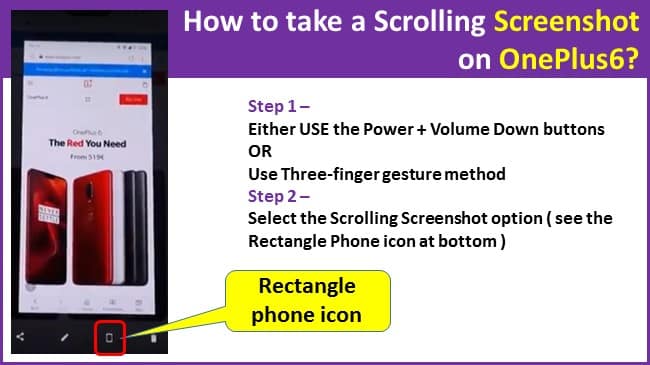
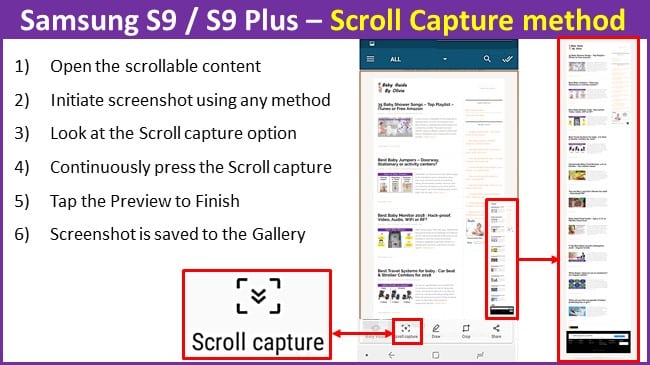
Method 3) Using scroll capture
Like most of the modern phones, LG Stylo 4 allows to capture extra long content like a webpage or whatsapp chat or an email or any long text / image message.
For this you can use the scroll capture feature.
Step-by-Step Guide
1) Open the screen you want to long capture like a browser window.
2) Drag the notifications panel downwards and then tap Capture+ >> Extended to capture the entire screen you are currently viewing as a single image file.
Note : Remember that the App you are viewing must be capable of scrolling downwards, i.e. support the scroll capture feature.
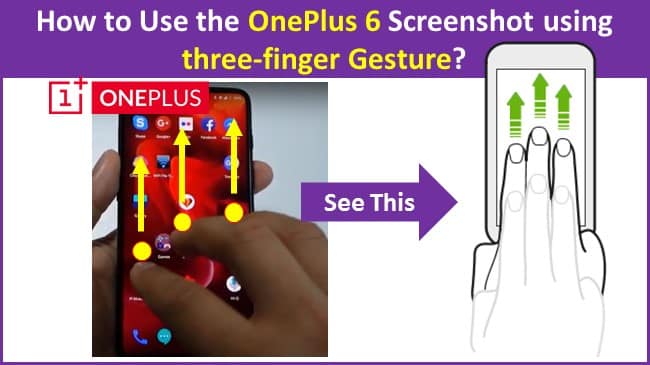
Method 4) Using Smart Rear Key
LG Stylo 4 has a new feature to use your fingerprint to quick shutter, quick screenshot, and control notifications.
For quick capture 2 touch of fingerprint sensor will make the work.
Take a screenshot: Double-tap and hold the fingerprint sensor.
Its so simple!
See the main image for this post demonstrating this method.
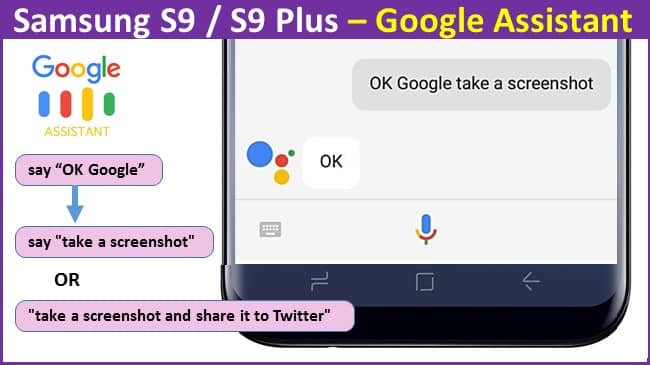
Method 5) Using Google Assistant
Lastly, one of my most favorite voice command method, which is available on most of the Android phones, so as in LG Stylo 4 phone.
The Google Assistant can take a screenshot for you with voice command without even touching it.
Step-by-Step Guide
1) Locate the image /content you want to capture on the screen.
2) Long-press on the Home button or say “Okay Google” or “Hey Google” to launch the Assistant.
3) Now either say “Take a screenshot” or type the command in using your keyboard.
4) You will not get editing options but your screenshot will be saved to your phone’s Photo Gallery, so you can edit it later or share it on social apps.
How to write notes on a screenshot?
Sometimes you wish to do some Writing of notes on the screenshot to provide some details like marking on a map or recipe details. Here is how to do it –
1) Tap O >> QuickMemo+ >> 📷
2) When the screen / map / image / photo or anything you wish to capture is open on your screen, press ⭕ to take a photo, then tap OK.
2) The screenshot taken will appear as the notepad background theme. And Memo tools will also appear at the top of the screen. Tap T or ✎ to write notes on the photo.
3) You can crop the image (if required) and add notes as desired or write notes by hand on the photo / snap.
4) Tap ✓ and save the notes on your device.
5) Saved notes (with snap) can be viewed in either QuickMemo+ or Gallery.
Note : If you like to save all generated notes in the same location every time, then select the Use as default app checkbox ☑ before selecting an app.
Bottomline
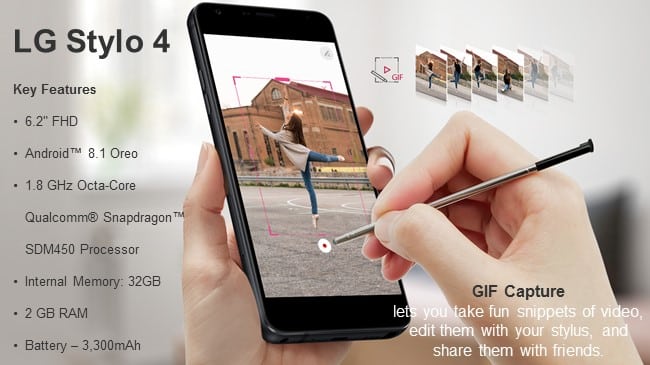
All new LG Stylo 4 has a FullVision display that delivers clearer picture quality, and a more vivid visual experience.
It has Portrait Mode which allows blurred background photos like a professional camera.
The thing that I liked the most is you can simply pull out the Stylus and begin writing on the screen without even turning it ON !
Making this device more powerful and smart by use of innovative screenshot features like using the fingerprint sensor is very good idea, it has made the task simple and quick too.
Other options like extra long screenshots using scroll capture with simple drop down menu selection also reduced the complex keystrokes and any layman can also use it to take website pages long screenshots easily.
Further editing and sharing the screenshots is also easy and happens only on a tap of button, the QuickMemo+ allows adding text to photos before sharing, that too you can do using the stylus.
Lastly the GIF capture allows you take snippets of video, edit them with your stylus, and sharing them with friends.
Overall a great package by LG.
Hope this helps!
Cheers!!


 So anyway enough methods now for trying at home ..